Little Mud
Stove
The goal of this project was to create
a smokeless wood-fired cook stove using simple materials and tools.
I found a 7”X10” scrap of 1/16”
thick steel (which is about 23 square inches smaller than a standard
piece of printer paper). I also found a couple 5' sections of 3”
sheet metal pipe (such as might vent a small gas water heater). I
built this stove with no more than these, and the earth beneath my
feet,
For a tool I found a 10” strap of
mild steel 1/2” wide by 1/8” thick. I modified it by filing a
chisel point on one end. A screwdriver would have been better since
it would have at least had a handle, but this challenge wasn't about
making things easy, just making them possible.
I began by packing the moist ground
beneath me, and adding a little to form a slight platform a couple
inches above the surrounding ground. I could have begun right at
ground level, but I was planning to eventually cover the surrounding
area with bricks, and a couple inches of nearby dirt doesn't cost
much. Also, since the area was rich loamy garden soil, I mixed in a
small amount of clay to make it a little more normal.
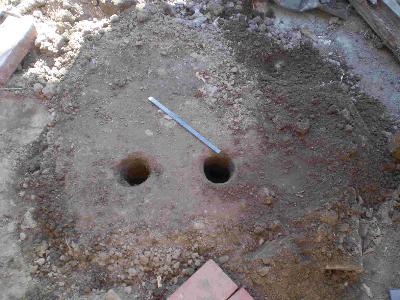
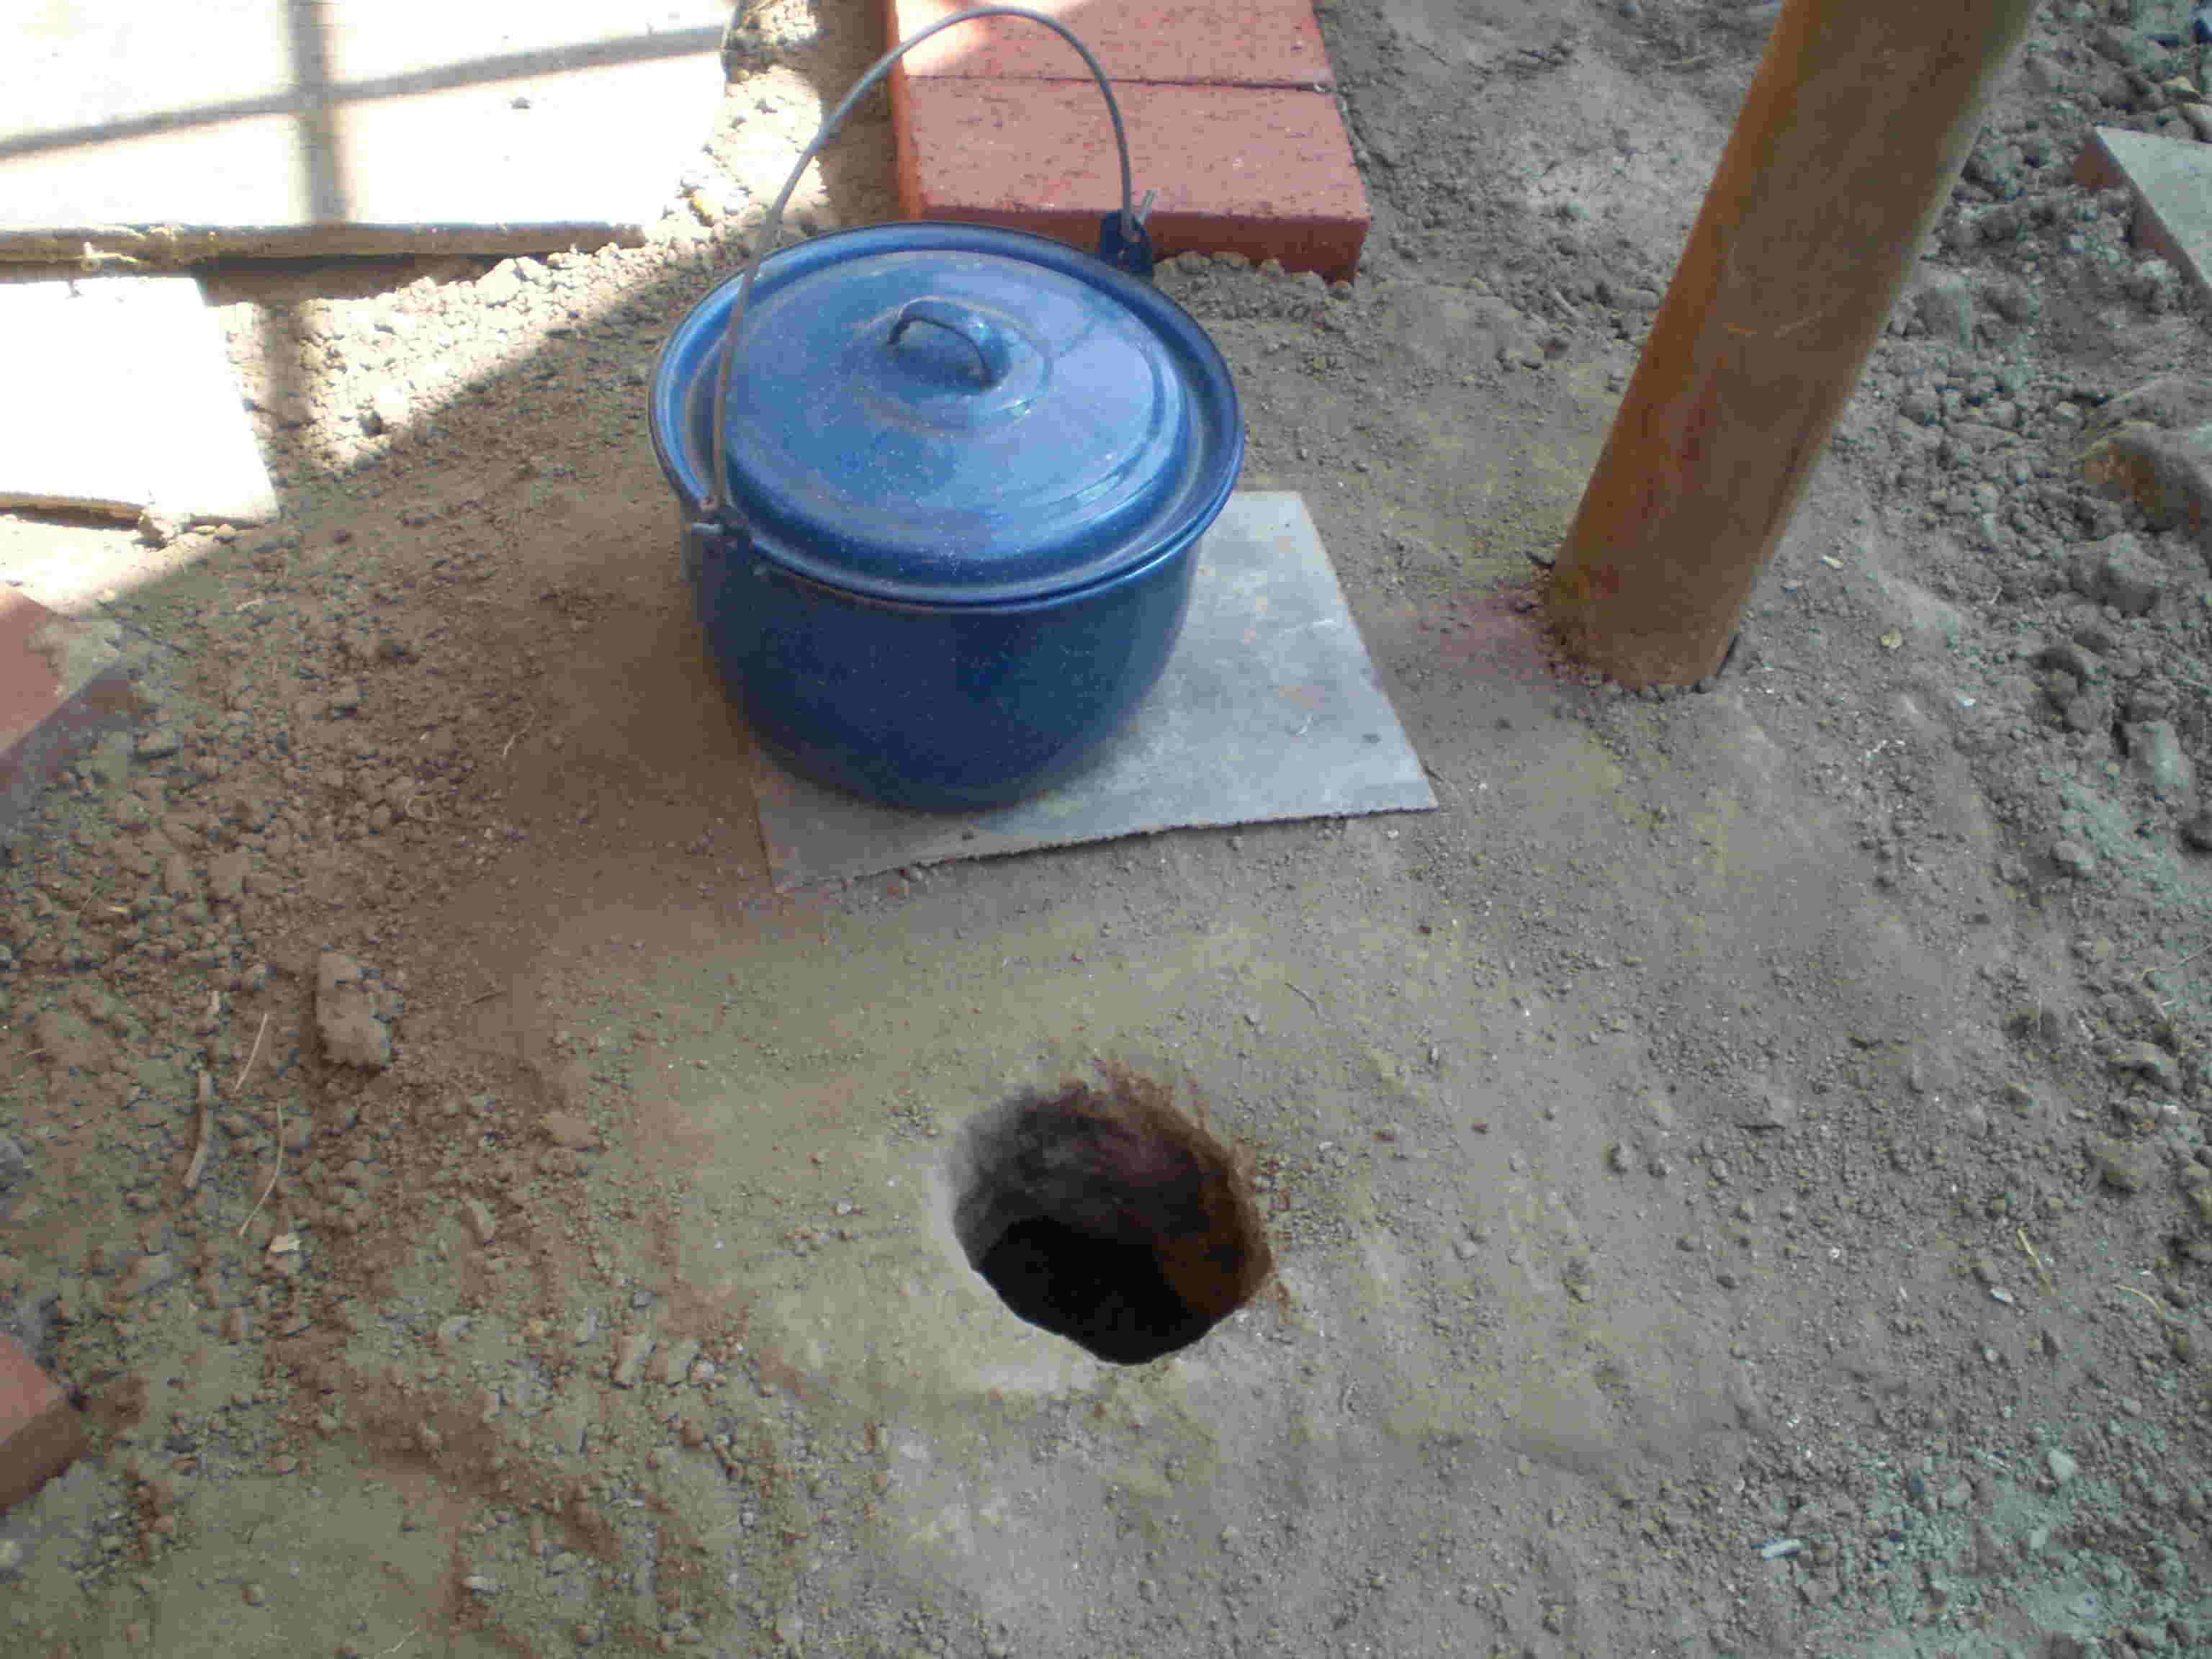
I then dug a couple of 3” holes about
1foot deep as shown below. Their centers are spaced about 8” apart,
but none of the dimensions are critical; remember that we are trying
to adapt to what we have, not to what we'd like to have.
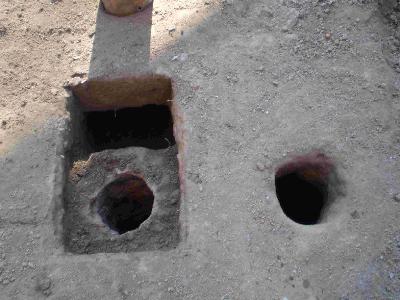
The hole on the right goes down about
3” and then widens out to about 6 inches. I didn't actually measure
it so that's only a guess. By doing that one first I was able to
tunnel over to the left and get under the hole I had started there.
The tool I used is also shown in this photo.
I dug out a 2-1/2 inch deep box, 6”X9”,
so I'd leave 1/2” overlap all around the 7”X10” scrap of metal.
The near end was centered over the hole on the left.
By digging downward at the other end I
was able to make a channel to a third 3” hole, to which I connected
the 3” flue pipe. In order to not dissolve everything by
accidentally spilling something on it I solidified the structure by
firing it. I did this by covering the rectangular hole with bricks to
trap the heat, limited spare drafts by pouring on a little dirt, and
built a fire.
Here's how this thing operates, and why
it works: About 40%of the energy available in wood is in the form of
smoke. When you burn the smoke, and the wood is doing the best that
wood can do. In order to burn the smoke you need a hot fire and
plenty of air – but who wants to sit there and keep blowing on it?
So, I used the 10 feet of flue pipe to create the draft that pulls
the air through the fire.
We don't
want all this good heat going to waste, so we make it blast directly
against the bottom of the steel plate (bricks for the initial
firing). It then flows along the underside of the plate, out the
bottom of the far end of the box, and finally
up the flue.
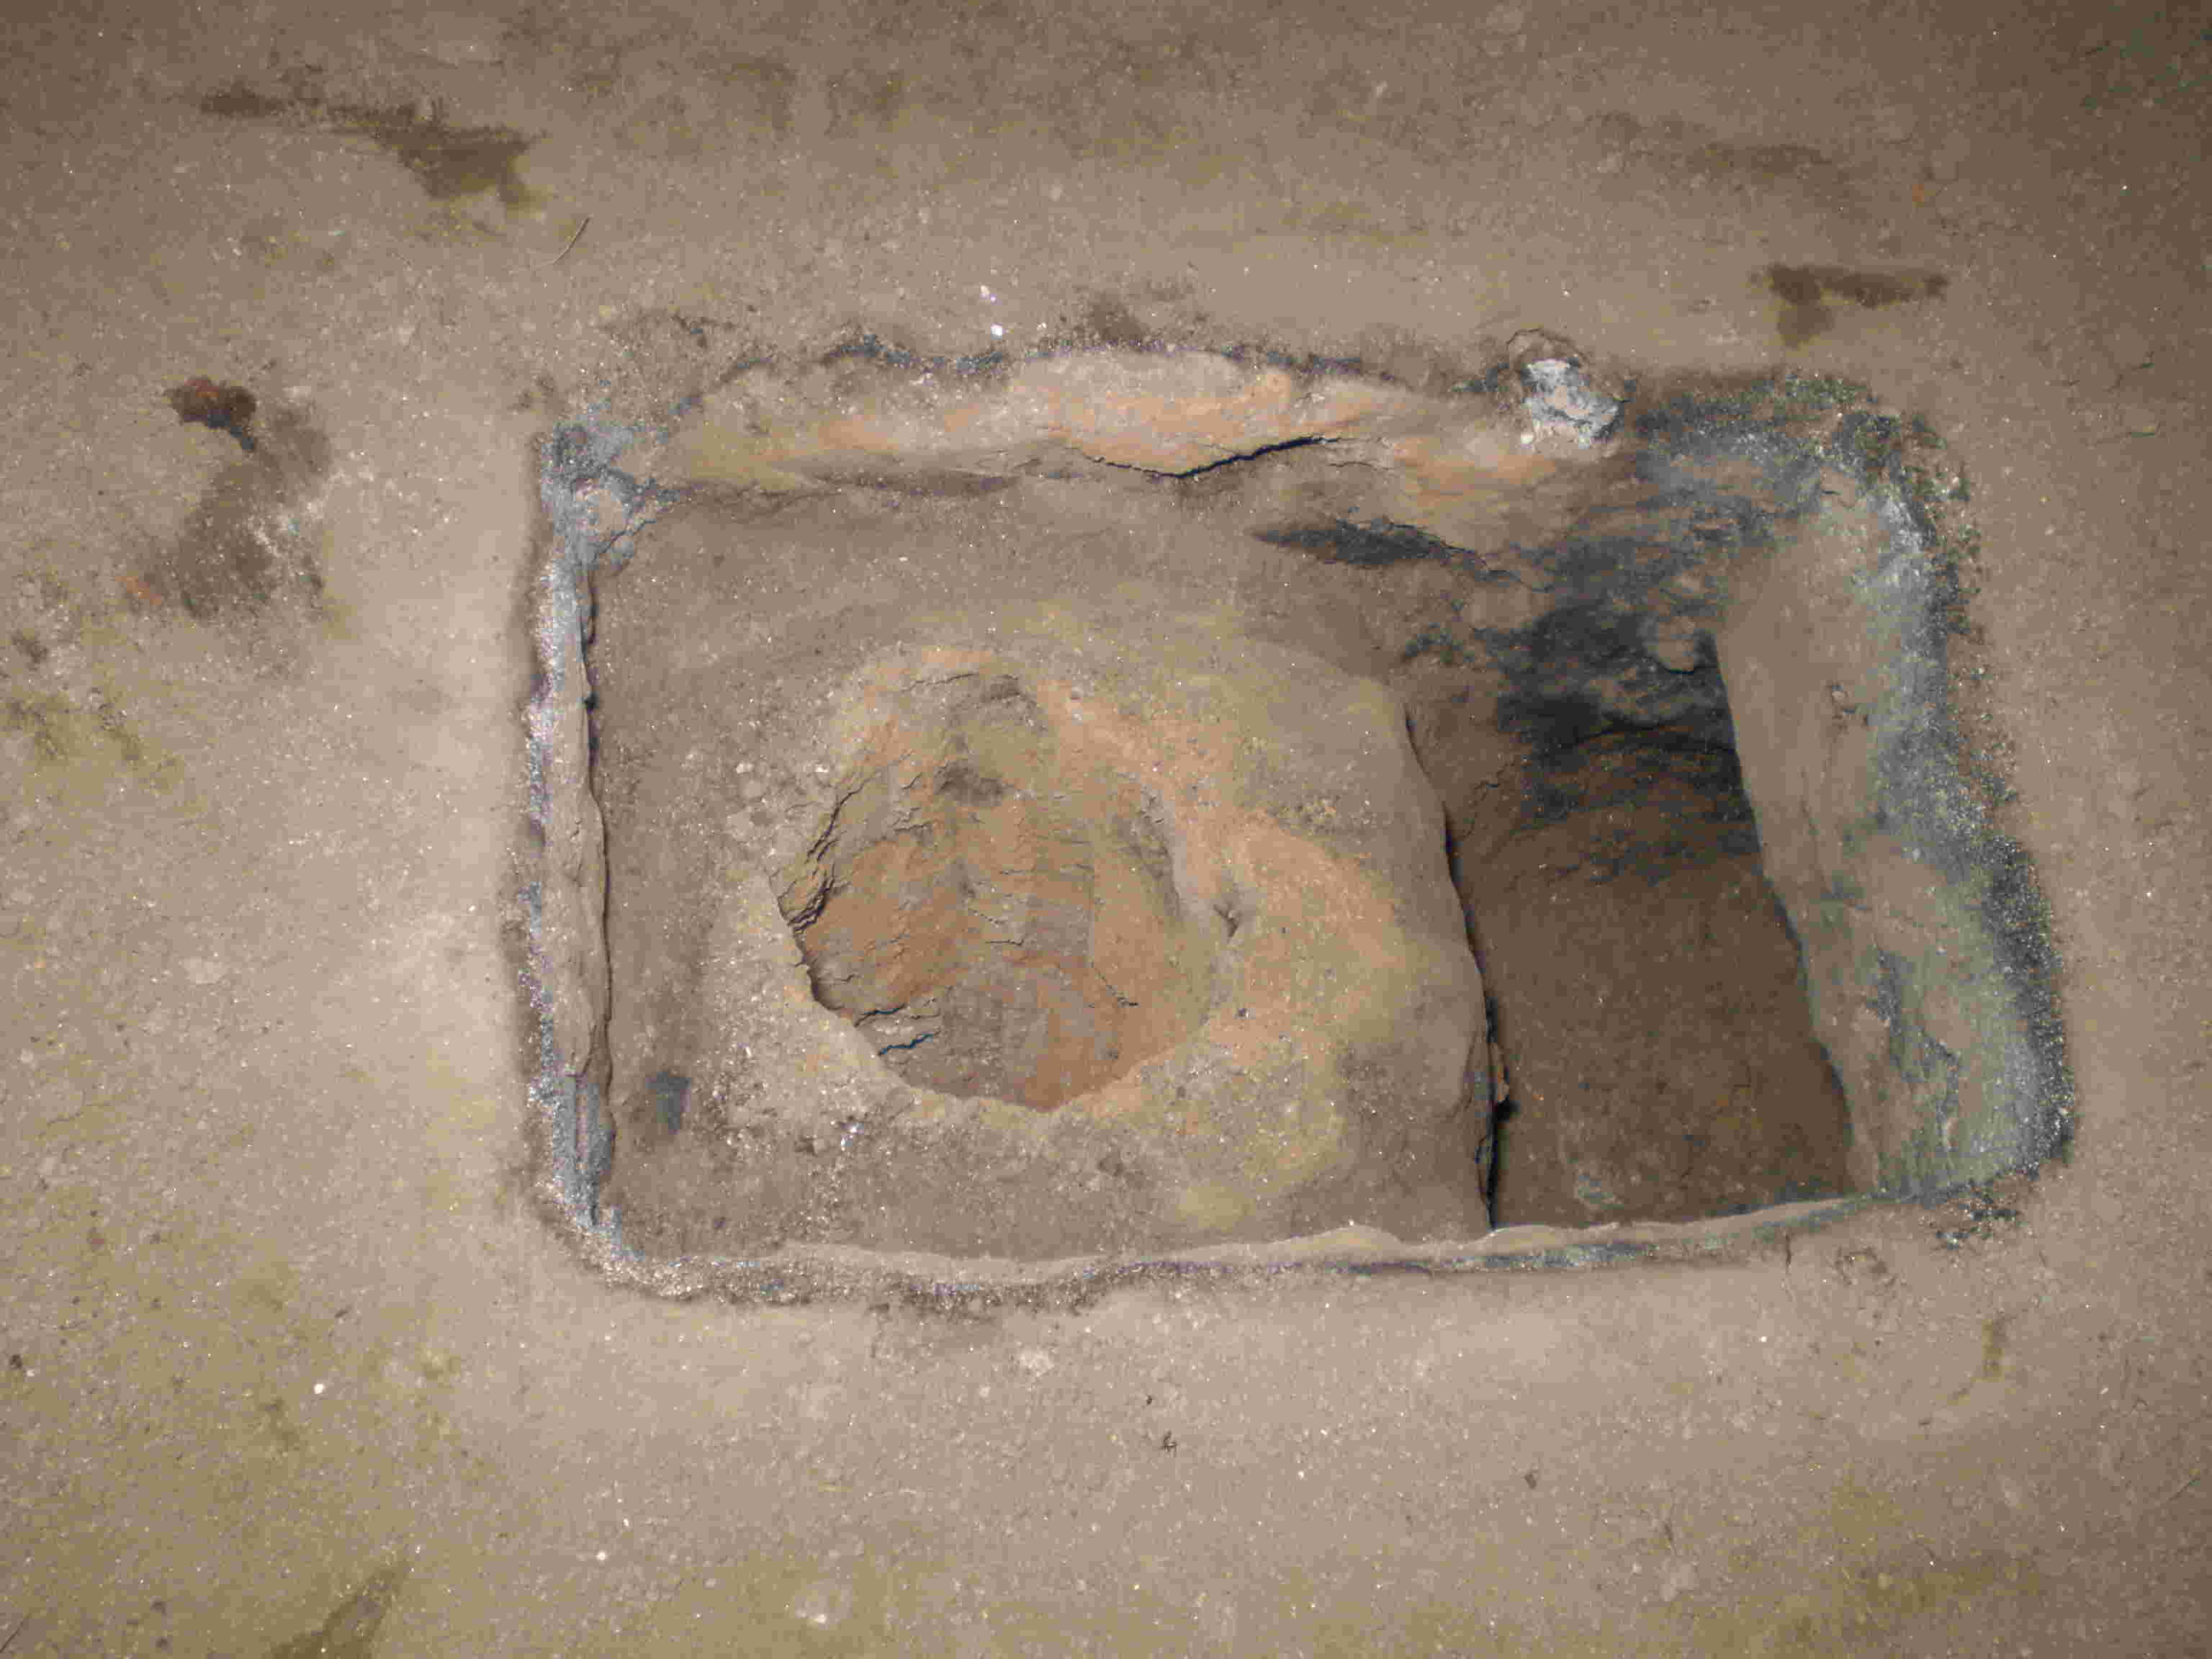
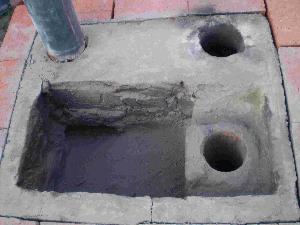
This photo shows the hole after the
initial firing. You can see the terracotta coloring around the 3”
hole and on the sides of the box from the firing. These sections
would no longer wash away if you spilled water on them. From now on,
the scrap of steel plate will cover the hole.
Fire is not smart enough to know that
there's a flue nearby, so once you get a little bit going give it a
good puff (as in blowing) into the hole, so that some of the heat
travels as far enough to find the flue.
If you'd rather not singe your
eyebrows, you could begin by placing a little fire in the pit at the
right of the box before placing the plate over it. This will get the
draft started.
Concerning ash removal there is good
news and bad news: The good news is that with this intensity of fire
there is a lot less ash to remove, and for the same reason, the ash
that you do have contains little or no charcoal. The bad news is that
you must reach in and pull it out with your hand.
I enlarged the hole over the burn
chamber to 4” to make it easier to remove the ashes. This seemed to
have no effect on the performance. Next time I'll begin with a 4”
fire-chamber hole so I won't rough up my hand while pulling the dirt
out in the first place.
The
proof is in the testing I had previously benchmarked performance by
noting the time it took to bring one liter of water to boil on our
modern gas stove, and comparing this time using the same container
and amount of water on a test stove.
The disadvantage in this case is that
whereas the flame of the gas stove played directly on the bottom of
the container, heat must now be absorbed by the steel plate, and
transfer to the container through the contact of two hard surfaces.
A further complication was that the
plate bowed upwards when subjected to the heat, so the contact was
between a slightly rounded one against a flat one.
Nonetheless, the performance was
impressive. This mud stove boiled the water in about sixteen minutes
(using a surprisingly small amount of wood), versus about ten minutes
for the gas stove.
The warping of the plate did cause
another problem in that it allowed air to get in around the edges to
cool the plate and reduce the draft. Pouring a little dirt around the
edges to seal them solved the problem in this case, but would have
complicated things if the fare had been hamburgers or tortillas. A
little bit of mud might have worked though. Alternatively, the design
might be enhanced by recessing the plate about a half-inch into the
surface. Keep in mind that this would also require lowering the
surface around the entry hole as well to allow clearance for the flue
gases.
The temperature can be controlled to
some degree by adjusting the size of the twigs and branches you are
using. Too much fire however can overwhelm the flue system and cause
“puffing”. When this happens the fire oscillates so that puffs of
fire and smoke jump out of the burn-chamber hole at regular
intervals.
Another thing to note is that once the
fire is strong, long pieces can be stood on end and protrude upwards
through the opening. The draft of air keeps the fire from escaping
the hole. This feature can be beneficial in that firewood pieces can
be longer, and the fire can automatically gravity-feed for a
sustained temperature while requiring little attention.
This is only the beginning
So where do you
happen to find a 7” X 10” scrap of steel? It may be the only one
I've ever seen, but use your imagination. If you had a piece four
times as big, that would have been fine. Make a stove to fit whatever
your needs are, and whatever your are able to find. I've seen a lot
of pots and pans that were 10” or more in diameter, and if the
corners of the rectangular hole had been rounded, a 10” diameter
pot would have worked directly without even needing the steel plate.
It
would in fact have worked better, since the flames would have been in
direct contact with it, instead of being separated by the steel
plate. The problem would have been that if you lifted it off the
stove, the fire would no longer be connected to the flue.
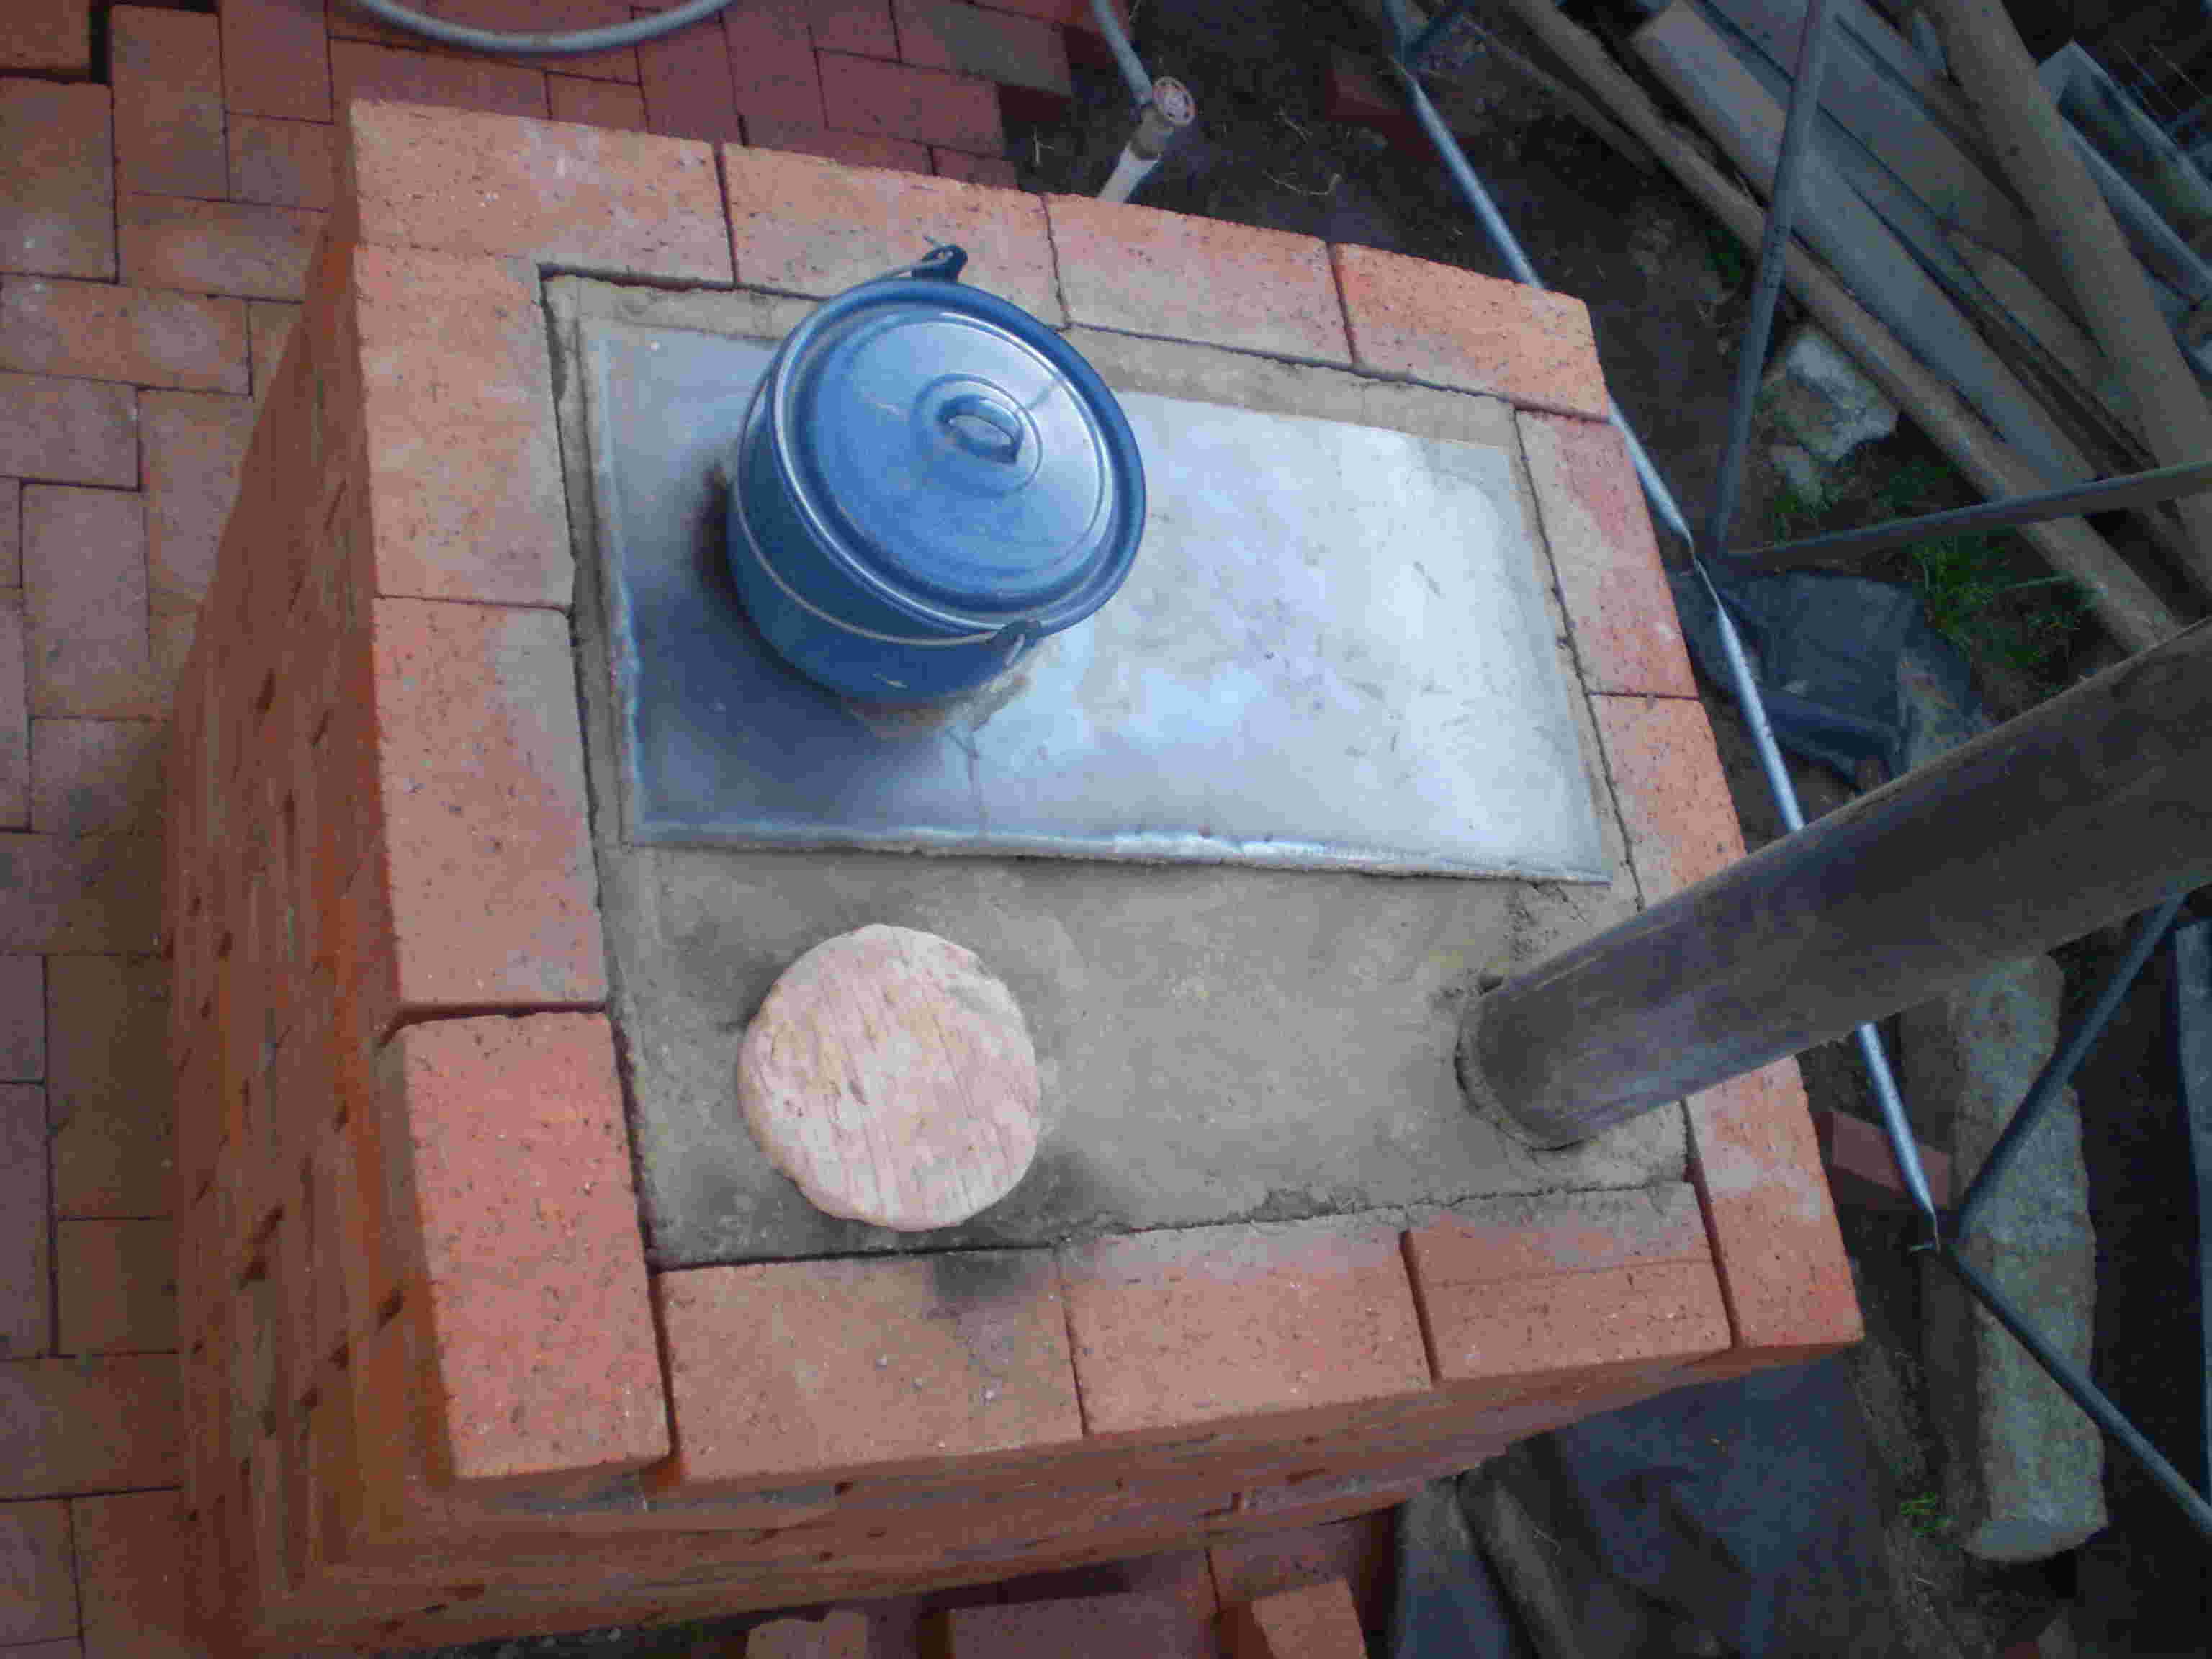
On a larger stove
I solved this problem by cutting a hole in the plate over the hole
entering from the burn
chamber. I have a circular plate of steel that covers the hole
when the pot is not in place
That isn't a
hamburger patty sitting the burn chamber, it's a piece of clay. In
the case of this elevated stove, I made an auxiliary air intake on
the side.
There
is more to this stove than just a pretty face. I have intentionally
built in an enlarged oven space that could be used for fire-hardening
clay bricks, floor pavers, and other items. The deep part of this
chamber is 14” X 10” X 10”. The holes and the flue pipe
by-the-way are 4” in diameter to accommodate the larger fire that
would be needed to drive this stove.
If you made clay
bricks 12”X6”X4”, you would be able to fire two at a time with
a little spacing in between.
If you made
hexagonal pavers 12” point-to-point by 1-1/2” thick, you could
stack four of them in here with a little space between
If you wanted
higher temperatures, you could lay about four of the above-mentioned
bricks across the top to trap more of the heat.
Using your
imagination a little, you could run pipes to heat water, do some
small-scale blacksmithing, burn your fingers, or perform innumerable
other thermal processes on an endless variety of stove shapes and
sizes.