16’
Bolt-Together Dome
R.
Buckminster Fuller was a visionary born near the end of the
nineteenth century. As a man concerned about the world’s
shortages, he invented the geodesic dome as a means of enclosing
large volumes with a minimum of material.
I
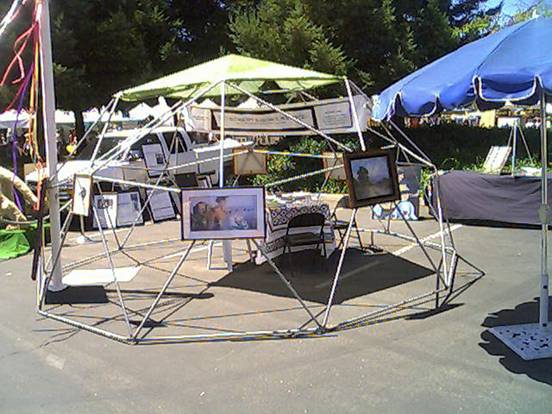
first built this dome in the early seventies for about $50. Since
then this structure has served as:
*
Shade
*
Hammock support
*
Tent in various campgrounds
*
Child’s swing support
*
Bedroom
*
Greenhouse
*
Storage
*
Shop
*
Swap-meet shelter
*
Garage
*
Cement form
*
$200 instant cash when a passing stranger wanted it bad enough.
This
list is by no means complete, but it's a good start.
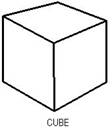
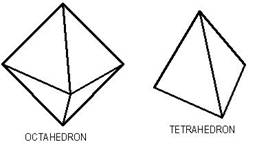
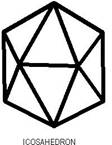
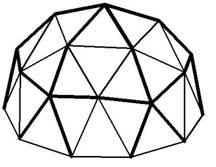
A
solid object with all its surfaces the same shape and size is called
a regular polyhedron. A few examples of regular polyhedrons are shown
here:
A
geodesic dome is usually created by adding additional faces to a
polyhedron. Since the icosahedron comes the closest to being a
sphere, it is the one most often used for this purpose.
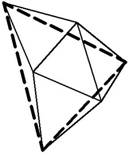
Picture
a sphere just big enough to surround a polyhedron. Now stretch
the center-point of each line so it touches the sphere, and connect
these points with additional straight lines. It is important to note
that length of these additional lines will be longer than the others
(The darker lines in the dome illustration below represent the
shorter lengths). Also notice, that their ends connect six lines,
instead of the five-point connections of the original icosahedron.
We
have just created the simplest form of geodesic dome. If we wanted to
get more complicated, we could now take the centers of each of these
lines and project them to the sphere, and so on. For our dome,
however, we’ll keep it simple.
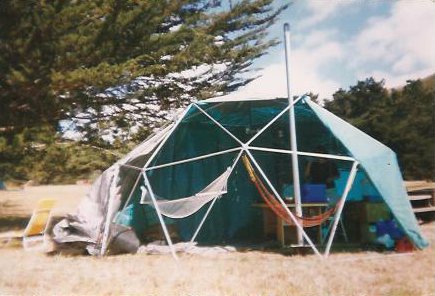
The
frame for this 16'8” diameter dome can be built for about $120
(as of March 2010). Properly covered it can be weather-proof and easy
to heat. The cost of the coverings varies widely, but is typically
less than the cost of the frame. It breaks down to a bundle of struts
a little over 5 feet long with a weight of less than 150 lbs.
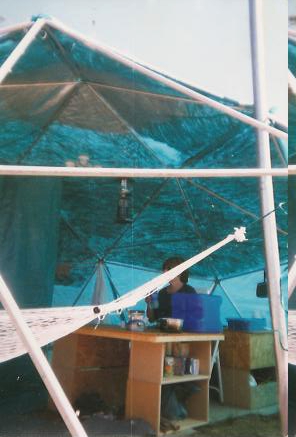
On the
interior left, you can see the partition curtain that separates the
master bedroom and bathroom from the living-dining area.
Various
sections of the covering could be temporarily removed or installed to
optimize the momentary preferences of sun, shade, and ventilation.
The
entire camp loaded nicely into the 6'-long bed of a compact pickup,
and you could still see over the load through the rear-view mirror.
When we
would rent a campsite for a week at a time the appointments of this
cabin included a self-contained flush toilet, and a bath pan we would
use for hot solar-heated baths every afternoon. This of course
included the usual kitchen, wood stove space heating, lighting,
chairs and hammocks as desired.
From
this cabin-campsite base we would tour an area with all the
convenience of a nearby home (using the economy vehicle that carried
it).
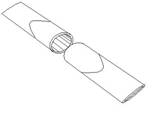
The
dome frame is made from 3/4" thin-wall conduit. It's 16' 8-1/2"
in diameter, about 215 sq.ft. in area, and weighs about 130 lbs.
Disassembled, it packs into a bundle of struts about 11" in
diameter by a little over 5' long.
Twenty-six
1/4" X 1-1/2" bolts plus nuts are needed to bolt it
together.
It
requires two different strut lengths so I calculated where to cut a
10' piece of conduit so you would get a long one and a short one out
of each stick (that is how it came out to 16' 8-1/2" diameter).
You need five more long ones than short ones, so for the 65 struts
required, you'll need to buy 35 10' sticks.
Cut
each one 63-9/16" from one end, and flatten about 2" on
each end of the two resulting pieces. I have found that about a
3-pound hammer and a stump or “biscuit” of wood makes an
ideal pounder and anvil for this application.
MAKE
SURE that the flattened ends are in line with each other, rather than
twisted into different planes.
DO
NOT use a driveway, concrete floor, or concrete anything else as an
anvil. The repeated shock of even this hammer will begin to produce
cracks far sooner than you might imagine. If you do happen to have a
steel anvil available, make sure it’s in the middle of a wooden
table, or otherwise isolated from any concrete slab.
Use
a center-punch to mark a drill position in the center of each
flattened area, about ½ inch in from each end. I have found
that if you use a wooden backing, and drive the punch hard (almost
through the metal) it takes a whole lot less time to drill the holes.
Drill
a 5/32” hole in each end of each piece.
Bend
the ends about 15 degrees in the same direction, so they will be
tangent to the same 16’ sphere.
Coverings
for this dome have included various forms of plastic, a parachute,
wood, and even cement. One I’ve found surprisingly satisfactory
is 6-mil black plastic lightly sprayed on both sides with aluminum
paint. The aluminizing radically reduces the heating of the sun on
summer days, and helps trap the radiant heat of a camp stove and
bodies on a cool mountain morning.
 The
method I find most versatile is to divide a covering of plastic or
tarp into six pieces – one for the top, and five around the
sides. The boundaries of these pieces are outlined by the heavier
lines on the sketch below.
The
method I find most versatile is to divide a covering of plastic or
tarp into six pieces – one for the top, and five around the
sides. The boundaries of these pieces are outlined by the heavier
lines on the sketch below. The
covering pieces are attached by pulling their edges around the struts
indicated by the heavy lines above, and hooking them on #10 x 3/4”
sheet metal screws spaced 8” apart. Seven screws per strut,
with the middle one centered, work out nicely for these lengths. The
screws should be installed in the same plane as the flattened ends.
Five
long struts will need these screws to secure the top cover, and ten
short struts with screws will be required to run down the sides.
The
edges of temporary coverings of plastic sheeting may be simply
impaled on the heads of the screws. More substantial materials can be
fitted with grommets.
When
forming a two-dimensional sheet to a three dimensional surface,
you’ll need to take up some slack around the edges. Fold the
excess along one of the struts and secure on both sides with duct
tape (unless you feel like sewing).
By
overlapping the edges of the coverings as shown below, you can get a
pretty good measure of protection from the elements.
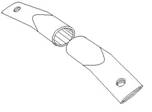
In
taking another look at the illustration below, notice that five short
struts (indicated by the heavier lines) will join at the original
points of the icosahedron. The other ends of these struts are joined
by four long struts and one other short strut.
may
be a hundred different sequences for bolting this thing together, but
here are couple suggestions to get you started.
Besides
the struts – some with sheet metal screws preferably –
nuts & bolts, it’s nice to have a few tools. Although a
pair of 7/16 end wrenches can do this, a ratchet fitted with a 7/16”
deep socket is a great help. If you bought carriage bolts instead of
hex-head (as I prefer), you’ll need a pair of vice-grips to
grasp the heads. Vice-grips are handy anyway, to help adjust errant
strut ends, and to compress stacks of them while bolting. You should
also have a hammer, something to stand on, and a friend.
1.
Lay out a circle of ten long struts on the ground. This will
establish the size and position of the finished structure, and leave
you with only fifty-five more struts to worry about.
2.
Build the dome up to the zigzagging ring of ten short struts (heavy
lines) about four feet off the ground.
3.
Connect additional struts to join a ring of five long struts near the
top.
4.
Join the remaining five struts with a single bolt into a spoke
pattern, and handle this as a group.
5.
Once everything is together, walk around the frame a couple of times
adjusting the position of each of the ten connections on the ground
to relieve stresses and conform to any irregularities.
6.
Tighten everything down, and go around lightly tapping in all the
sharp edges with your hammer, so you won’t tear your covering.
I also like to add a piece of duct tape over each of the bolts to
further reduce wear on the covering.
As
you build it, aim the screws in the five long struts around the top,
inward, and the screws on the short struts all towards the right.
This will give you consistency and a water-shedding overlap when it
comes to applying the covering.
This
structure has quite a bit of volume for its weight, so under windy
conditions so you might prefer to tie it down to terrorizing the
neighborhood with an exceptionally large tumbleweed.
One
very secure way of doing this is to flatten and drill one end of
short (about a foot) pieces of tubing. Dig small holes under the
connections on the ground, bolt on the short pieces, and cast them in
concrete.
In
one case, I dug a ditch about 6” deep around the perimeter and
laid the bottom of the plastic in it. When this “skirt”
was covered with dirt, it made a secure, draft-free seal.